Excel Tutorial: How to save Excel files on your drive?
Tutorial Code: BE13
Introduction:
This tutorial will guide you through various options and shortcuts for saving Excel files on your hard drives. Any user must understand how to save Excel files to avoid the loss of their crucial data and files.
Where can you find the “Save” Command in the Excel file?
The “Save” button is present in the “File” header tab of the Excel workbook, it is used to save the workbook on your desktop.
Path to save command:
File > Save
Understand the difference between the “Save” and Save As” commands.
In the file ribbon tab, there are two save commands a) Save and b) Save As, Let’s understand the difference between these two.
A) Save As: This command is used to save the file along with the change in the name. For example, if you have a file open on your desktop and its name is “Excel Hippo Example”, and you want to save the same file with a different name say, “XYZ Corp” then you must use the “Save As” command.
Here are Steps to save the file with a different name using the “Save As “command:

- Go to the “File” Tab.
- Click on the “Save As” command, it will ask for the location where you want to save the file. The main locations are:
a. This PC
b. Add a place and the third option is “browse” location.
3. You can browse for the location on your desktop and select the location where you wish to save your file.
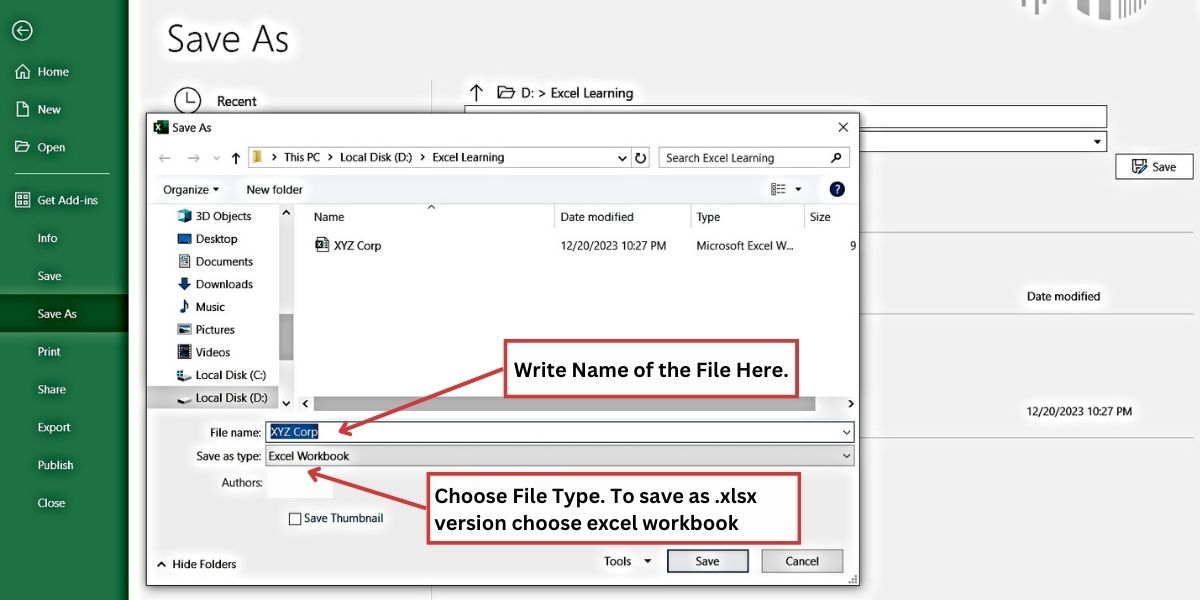
4. A new window will open, and it will ask for two things:
i) File Name: Type any name you want to give to the file, you may write XYZ Corp
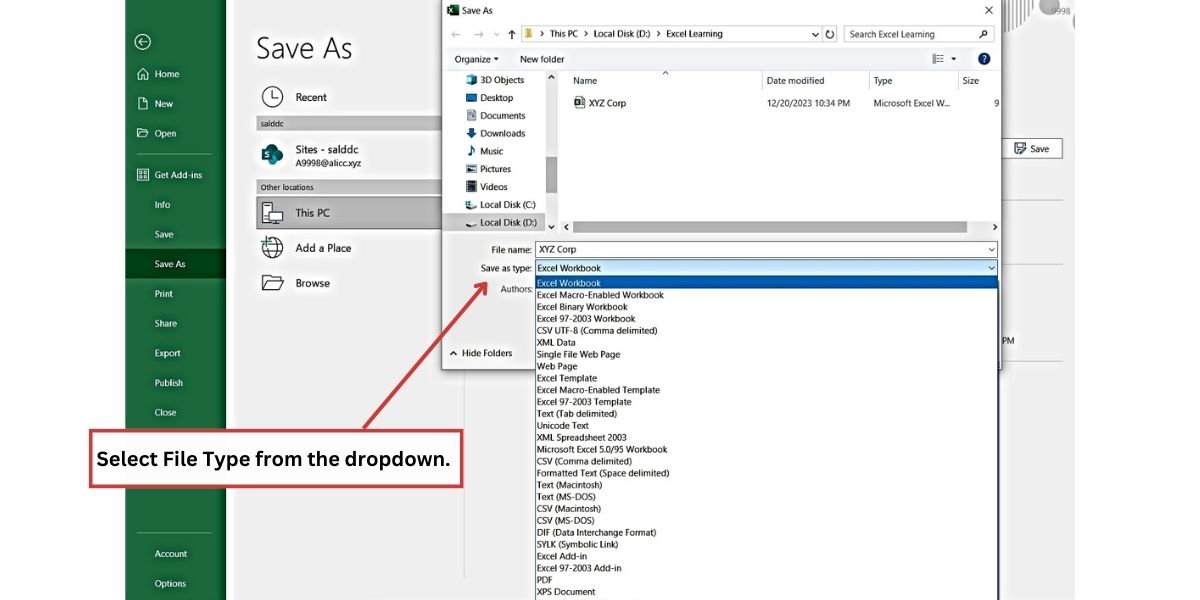
ii) Save As Type: By default, it will give Excel Workbook, however, there are other options that you can select from the dropdown menu. At this stage just opt for “Excel workbook”. See the image below.
Here is the shortcut key for the “Save As” command: F12 (F12 Key on your keyboard)
B) Save: This command is used to save the file while working on it after regular intervals so that your work is updated and saved till the last moment. When you use the “Save” command for the first time on the new workbook, it will ask for the Name you want to give to the file and the location where you want to save the file.
Here is the shortcut key for the “Save” command: CTRL+S
You can use the AutoSave feature of Excel to save the workbook automatically so that you don’t have to save Excel every time you perform some tasks on the workbook. In Microsoft 365, the AutoSave feature applies only if you save your work on OneDrive, however, there is an Auto Recover feature in MS365 that by default saves your workbook every 10 minutes.
You can change the time for the Auto Recover feature by following the below path:
- Click on the File Tab
- Select “Options”
- Select Save
- Check “Save AutoRecover information every” and increase and decrease time in the cell.
- Click OK.
Save Excel Files with different extensions.
You can save your Excel workbook with various types of extensions. The default file extension for Microsoft workbook is .xlsx type.
 The first two alphabets here stand for ‘Excel’ because of its phonetics and ‘S’ stands for spreadsheet. Microsoft first introduced the .xlsx extension with its Office 2007.
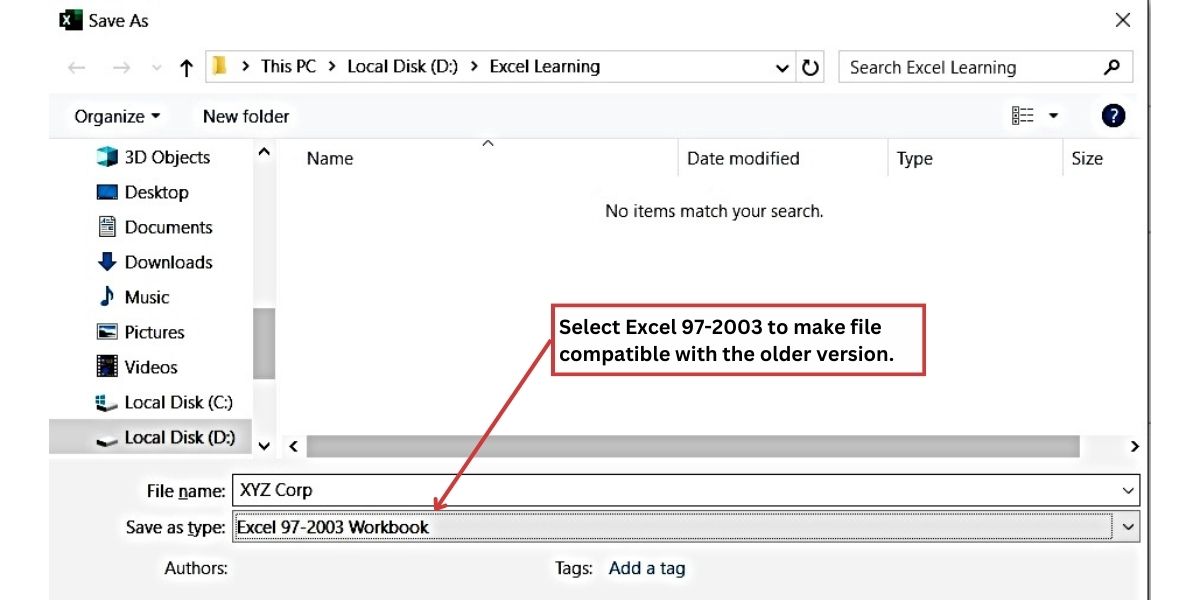
Now the questions arise whether the latest version of Excel is compatible with the older version of MS Excel, or in other words, whether you can save the current version in the old version format.

Yes, you can do that by opting for the “Save as type” ‘Excel 97-2003 Workbook’.
Similarly, you can save Excel as a CSV file or other file type.
